Forecloud Technologies Pvt. Ltd. - OCR (Optical Character Recognition) Service setup in Business central and create Purchase Invoices using OCR service in Business Central.
In this Blog, I will share with you the step-by-step process of setting up OCR (Optical Character Recognition) Service setup and create Purchase Invoices Document using the OCR service in Business Cen
Introduction:
In this Blog, I will share with you the step-by-step process of setting up OCR (Optical Character Recognition) Service setup and create Purchase Invoices using OCR service in Business Central.
Pre-requisites:
- Business Central Environment
Solution:
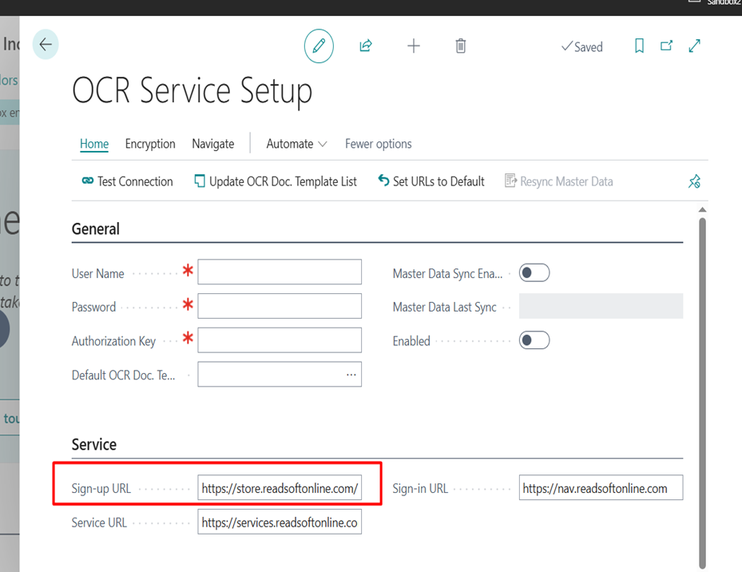
Step 1: Sign Up for the OCR Service
Search for the OCR service setup in Business Central. Once found, copy the URL from the sign-up URL under the "Service" tab.
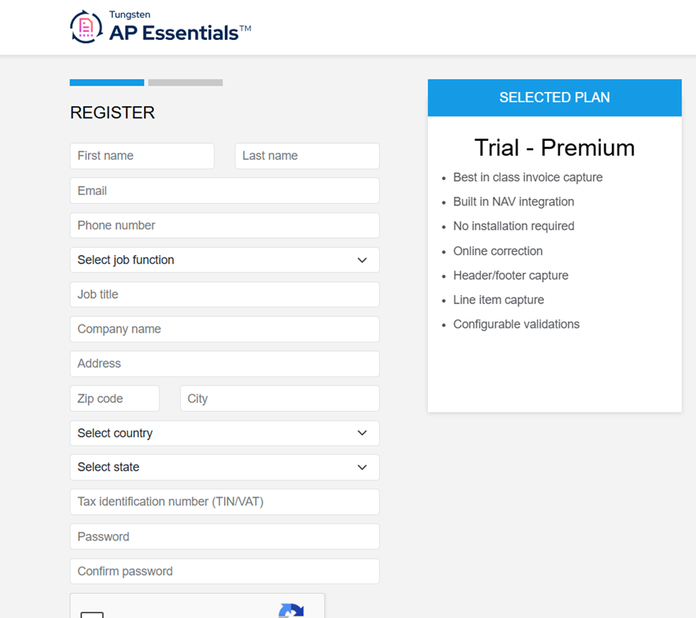
Step 2: Register for a Trial Account
Once you are on the sign-up page, you will find a login window where you can create a new account here I have chosen the trial account option to explore the OCR functionality.

Step 3: Register the account
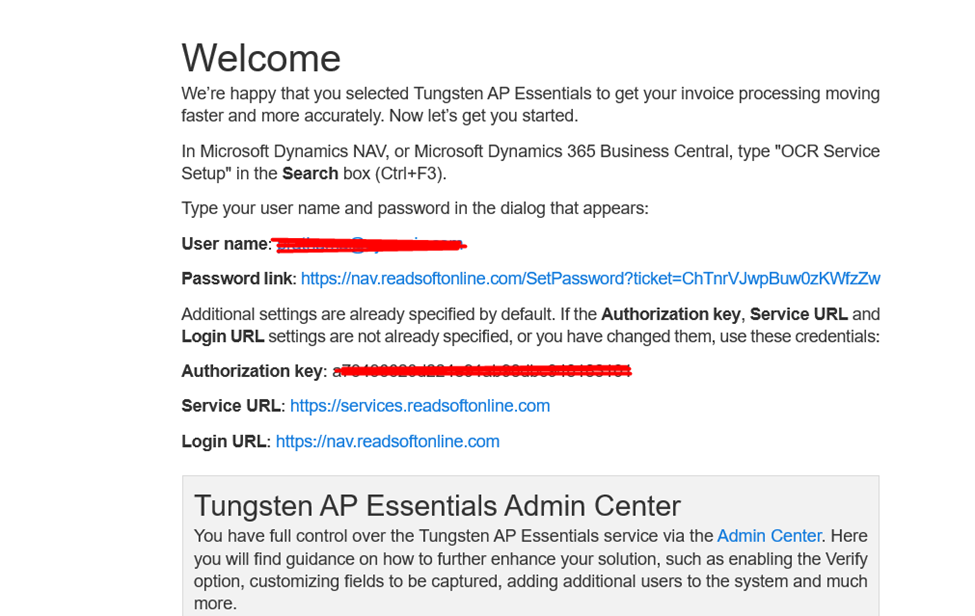
Step 4: Complete Registration
After entering your details and signing up, you will receive a confirmation email with your credential
Step 5: Configure OCR in Business Central
Search for the OCR service setup in Business Central globally. Enter the username, password, and authentication key that you received in your credentials email. Choose the default OCR document template for your setup.
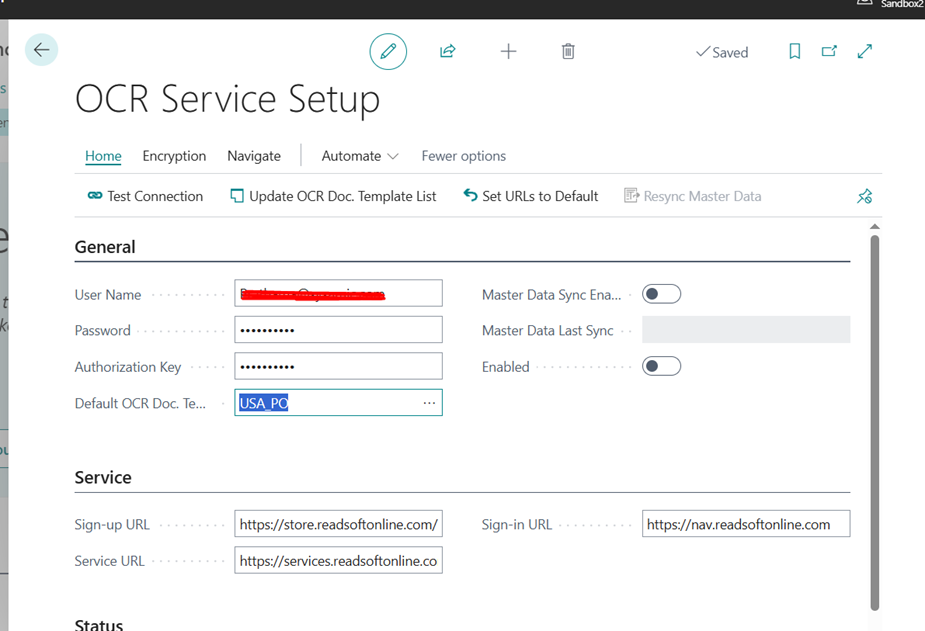
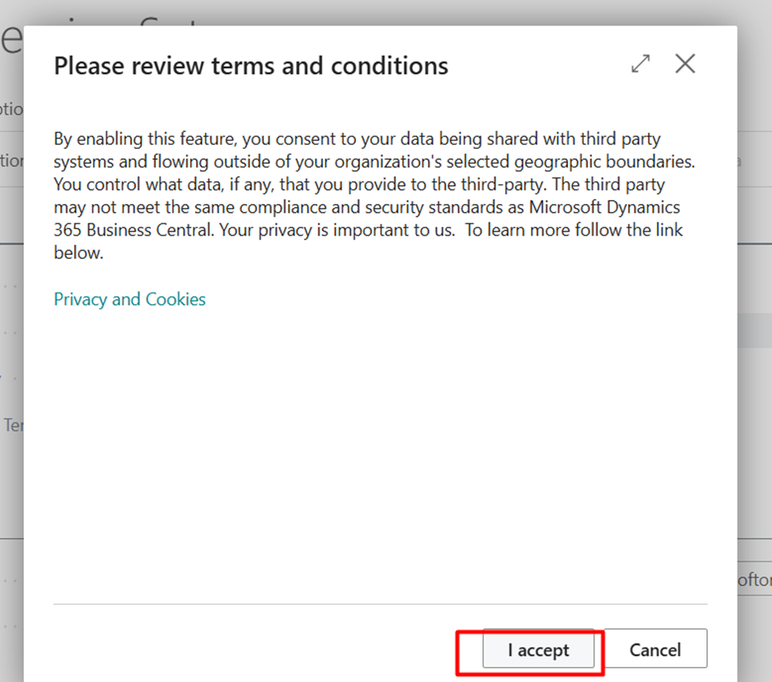
Step 6: Enable the OCR Service
Once the details are entered, click the "Enable" button. This will trigger the creation of a Job Queue that will be used to process the OCR documents.
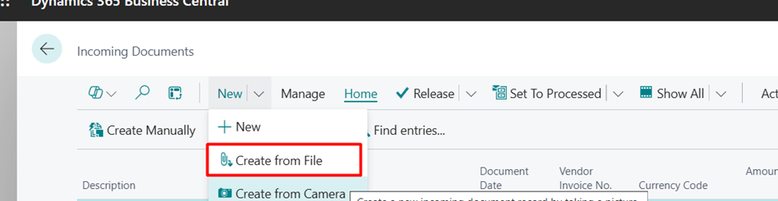
Step 7: Create an Incoming Document
To create an incoming document, search for "Incoming Documents" in Business Central globally. Select the option to create a new document and choose the "Create from File" option. Attach the Purchase Invoice document that you wish to process using OCR.
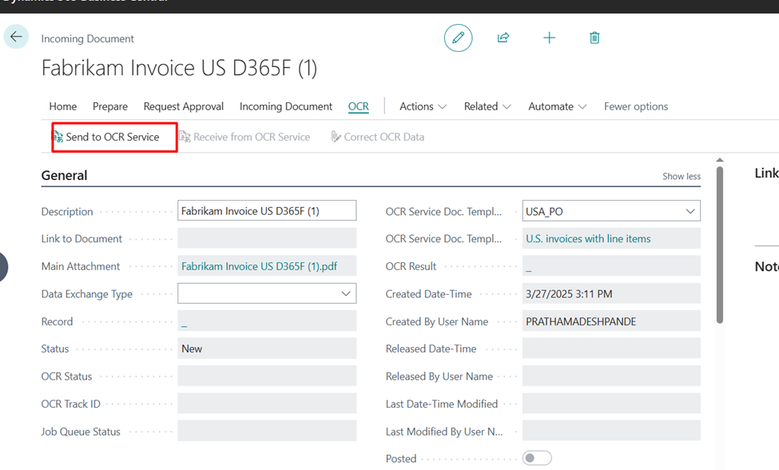
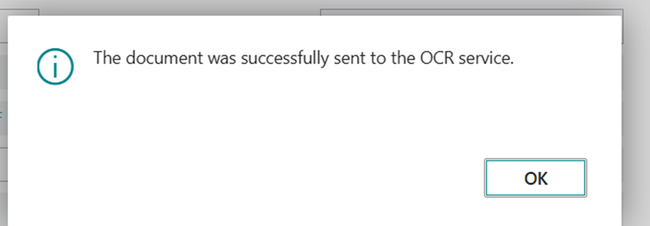
Step 8: Send the Document to OCR Service
Once the incoming document is created, click on the "Send to OCR Service" option. This manually sends the document to the OCR service for data extraction.
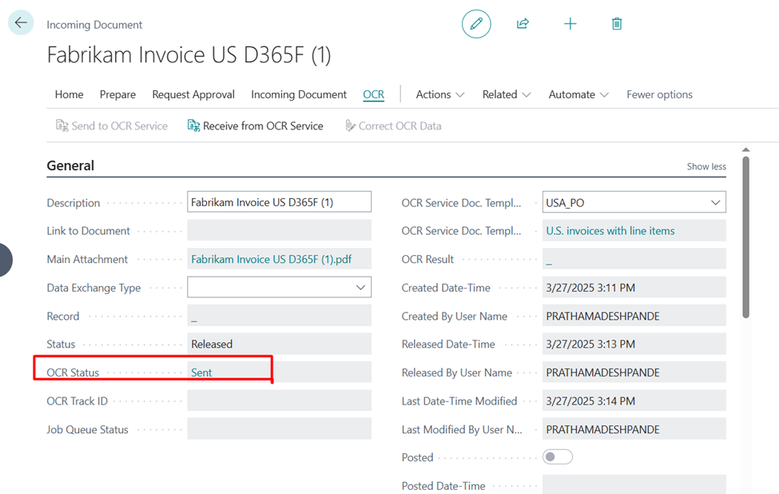
Step 9: OCR status value changed to sent
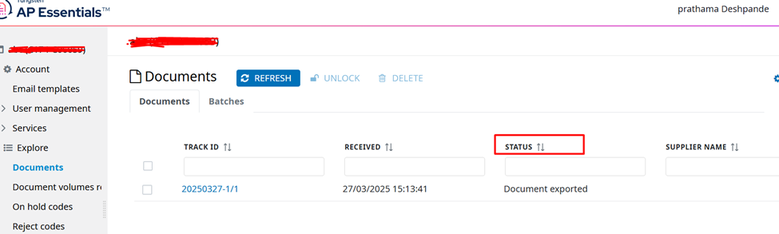
Step 10: Access the Admin Center
To track the status of your document and verify its processing, log in to the Admin Center URL provided by the OCR service. Here, you can monitor the progress of your documents.
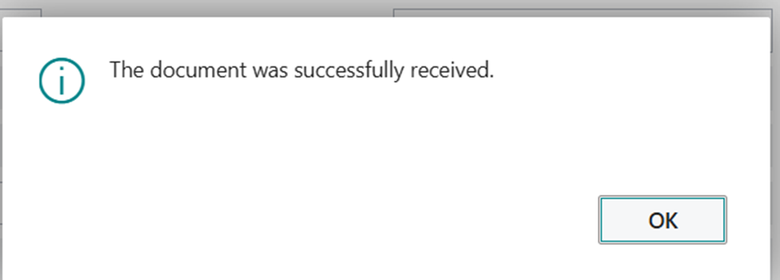
Step 11: Receive the Document from OCR Service
Once the document is processed by the OCR service, click on the "Receive from OCR Service" option to retrieve the processed document back into Business Central.

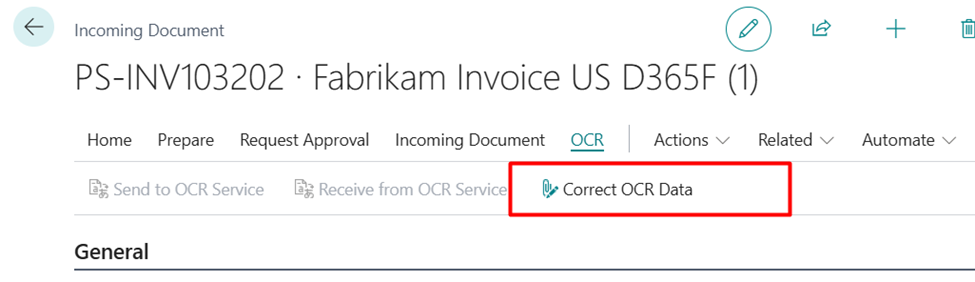
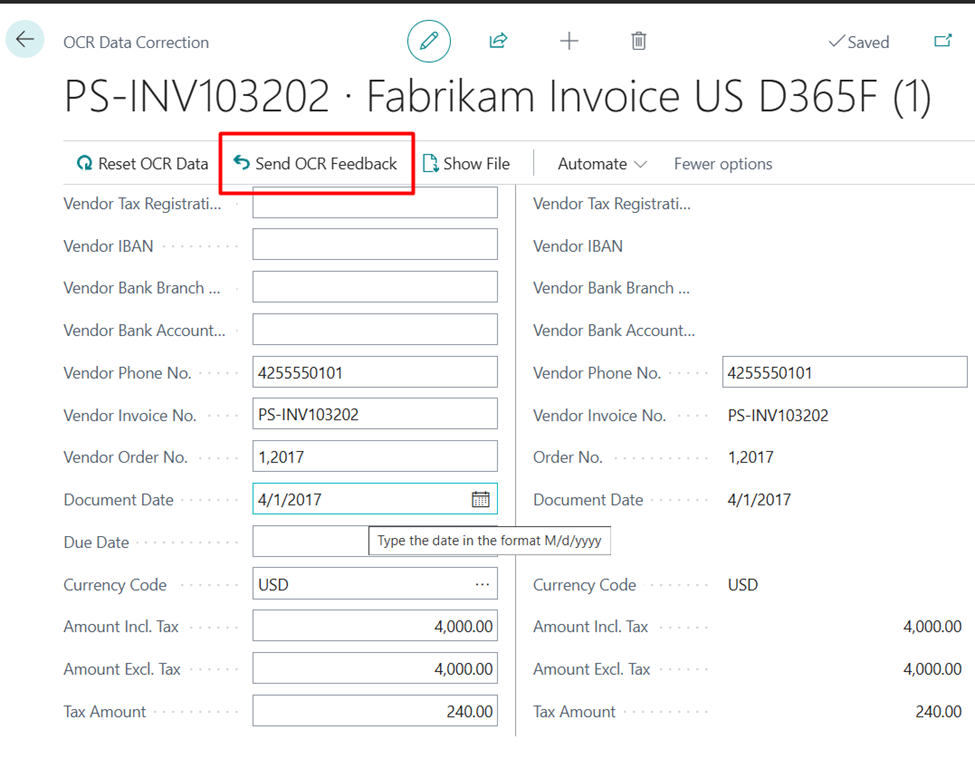
Step 12: Correct OCR Data (If Needed)
If you need to correct any data after receiving the document, you can select the "Correct OCR Data" option from the OCR action menu. After making the corrections, use the "Send OCR Feedback" option to send the updated document back for further review or processing.
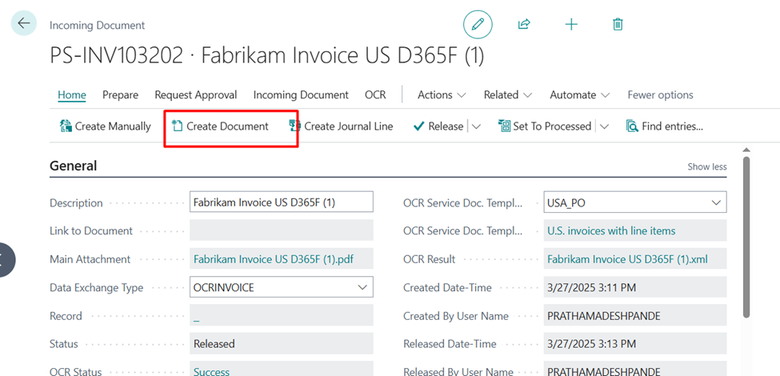
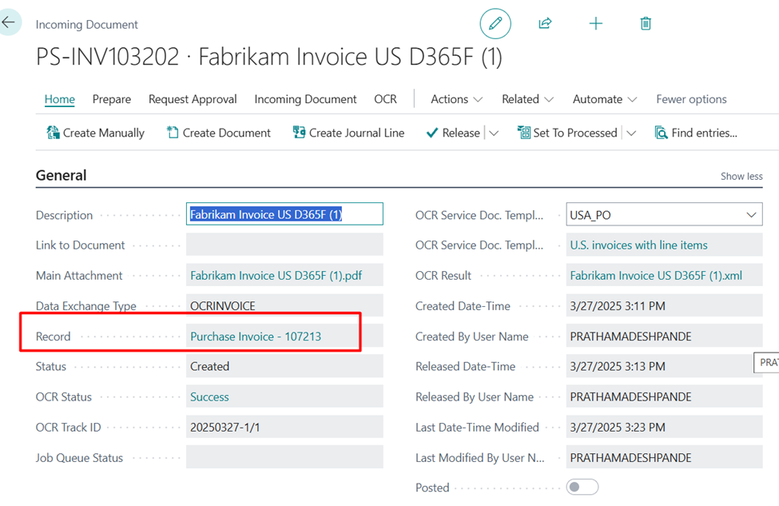
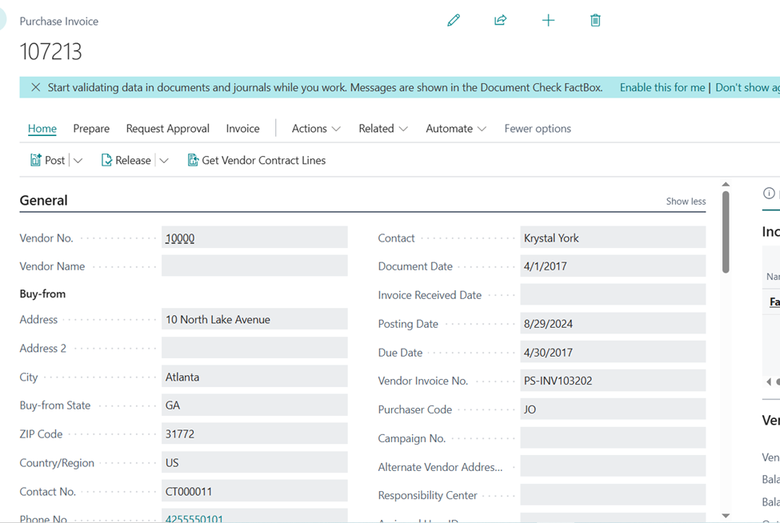
Step 13: Create the Purchase Invoice
Once the document has been processed and the data is accurate, you can now create the Purchase Invoice. Simply navigate to the "Home" tab and select the "Create Document" option. A Purchase Invoice will be generated based on the OCR data.
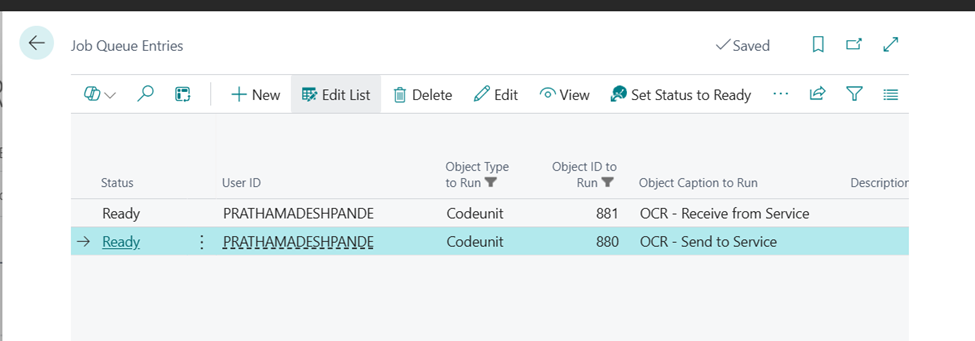
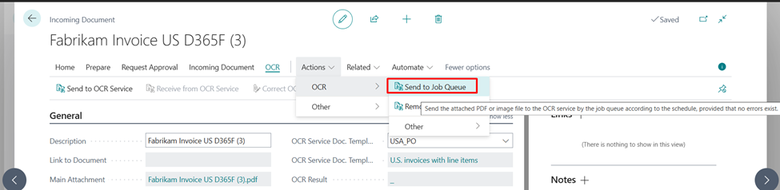
Step 14: Automate Using Job Queue
You can also use the Job Queue process to handle the document creation. After creating the incoming document, select "Send to Job Queue" from the Action tab. When the job queue runs successfully, the document status will change to "Release," allowing you to create the document.
Conclusion:
In this guide, we’ve walked you through the steps of setting up the OCR service setup and creating a Purchase invoice document in Business Central.
Prathama Deshpande
Prathama Deshpande is a dedicated Business Central Developer working with Forecloud Technologies since 2023. She is one of the key responsible person for Business Central Customization Development and Functional Implementation and Support.
No comments yet. Login to start a new discussion Start a new discussion