Forecloud Technologies Pvt. Ltd. - Setup Item Charge and posting with Item Charge
In this guide, we’ll walk you through the process of setting up and applying item charges in Business Central
Introduction:
In this guide, we’ll walk you through the process of setting up and applying item charges in Business Central
Pre-requisites:
- Business Central Environment
Step 1: Setting Up Item Charges in Business Central
- Search for Item Charges
- In the search bar, type "Item Charge" to access the Item Charge list.
- Click New to create a new item charge.

Step 2: Using Item Charges on Purchase Documents
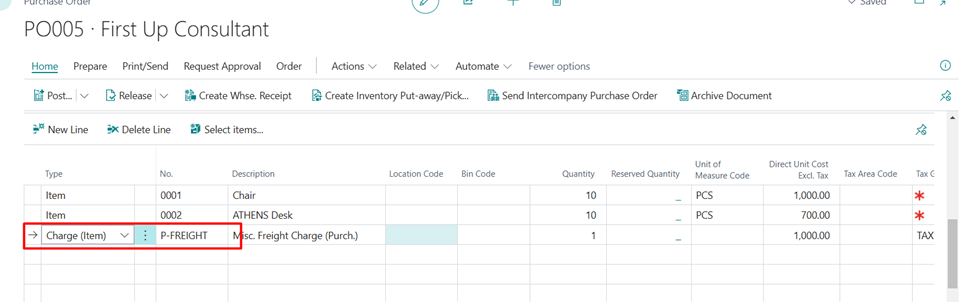
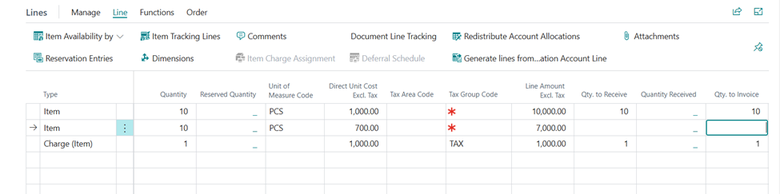
- Create a Purchase Order
- Create a purchase order with the type Item Charge.
- In the No. field, select the item charge number.
- Add the Quantity and Direct Unit Cost Excl. Tax for the item.
Step 3: Setting Up General Posting
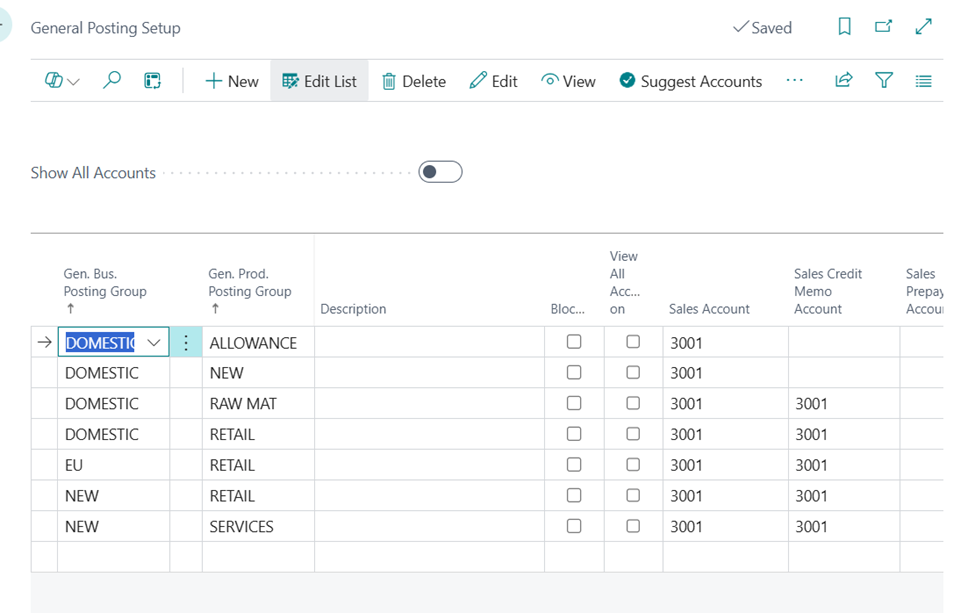
- General Posting Setup
Before posting, ensure that the General Posting Setup is configured properly. This is crucial, as trying to post without the correct setup will result in an error.
Step 4: Assigning Item Charges to Item Lines
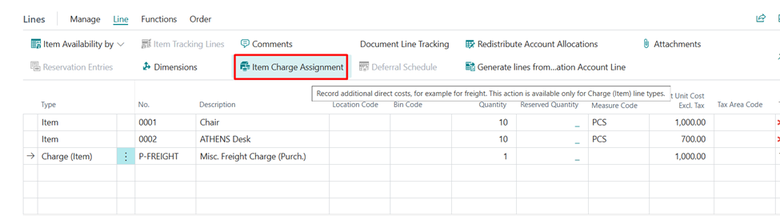
- Item Charge Assignment Setup
- Navigate to Line > Item Charge Assignment to assign item charges to the purchase order.
- The Item Charge Assignment page will open, where you can assign quantities for each item.
Step 5: Using the Suggest Item Charge Assignment Action
- Suggested Distributions
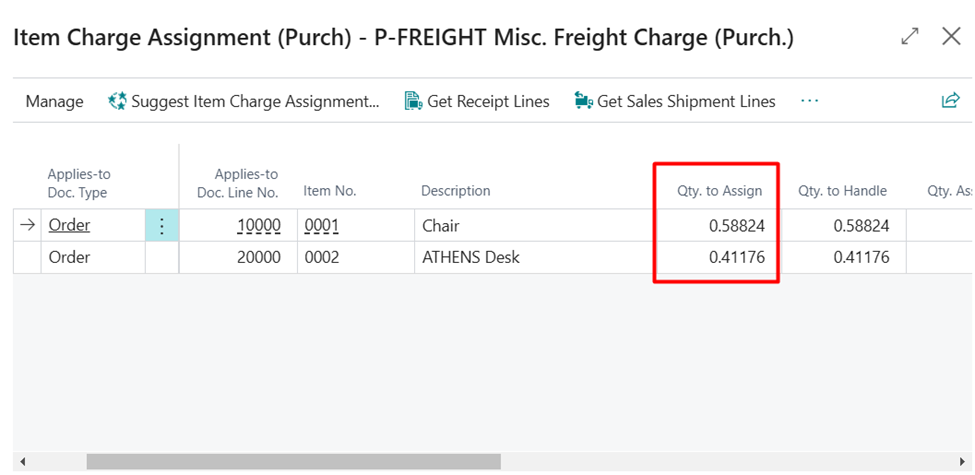
Business Central offers a helpful feature called Suggest Item Charge Assignment, which automatically distributes the item charge across the document lines.

You can choose one of the following methods:
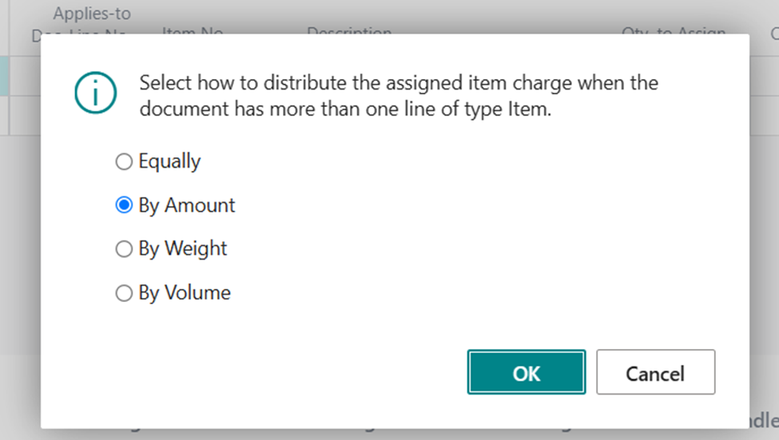
- Equally - The cost of the item charge is assigned equally to all lines in the Item Charge Assignment (Purch) window.
- By Amount - The cost of the item charge is assigned according to the content of the Line Amount field in each original line.
- By Weight - The cost of the item charge is assigned according to the sum of weight of the items (configured on an item card) in each original line.
- By Volume - The cost of the item charge is assigned according to the sum of volume of the items (configured on an item card) in each original line.
In this example, we'll select By Amount. After selecting this, click OK to update the qty to Assign value to each item.
Step 6: Posting Partial Shipments with Item Charges
- Partial Shipment Scenario
When posting a partial shipment, it’s important to note that the item charge can't be posted in full for the entire order if only one item is invoiced.
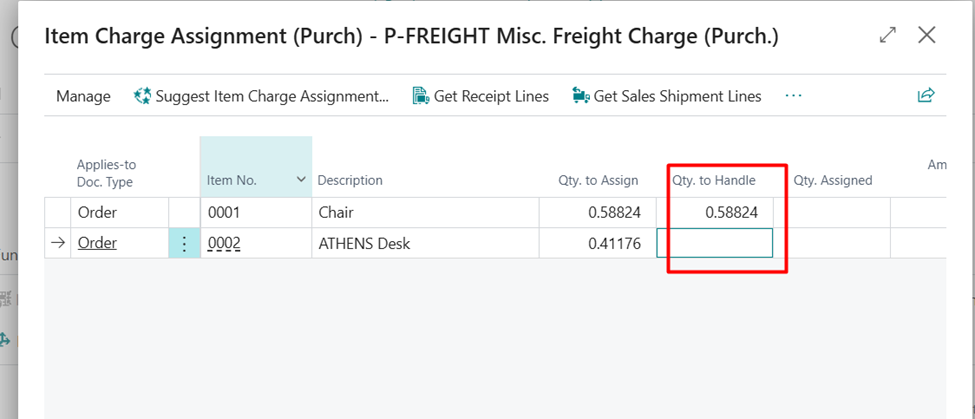
For this example, if you have two items and only want to post one, add the Qty to Receive value on item charge line only for one item , and Remove the value from the Qty to Handle field for the second item in the Item Charge Assignment page.
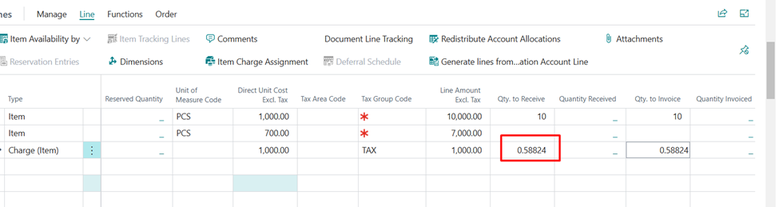
After assigning the quantities for the first item, you can post the purchase order. Following this, the Quantity Received, Qty to Invoice, and Quantity Invoiced fields will be updated.

Step 7: Posting the Remaining Items
- Complete the Remaining Lines
To complete the remaining lines, return to the Item Charge Assignment page. Assign the Qty to Handle for the remaining item and post the remaining item and item charge.
Conclusion:
In this guide, we’ve walked you through the steps of setting up and applying item charges in Business Central.
Prathama Deshpande
Prathama Deshpande is a dedicated Business Central Developer working with Forecloud Technologies since 2023. She is one of the key responsible person for Business Central Customization Development and Functional Implementation and Support.
No comments yet. Login to start a new discussion Start a new discussion